Showing posts with label mini album. Show all posts

Wednesday, December 2, 2015

December Inspiration for Blue Fern Studios

Hello friends!

Can you imagine, Christmas is less than 4 weeks away? I'm totally excited, and the cool weather has definitely put me in a festive mood.

Today, I'm up on the blog to share my creations for December, using the fabulous Vintage Christmas collection. While there are so many beautiful festive images for the season in this collection, there are also more generic papers that can be used for other themes. 

For my first share, I've made a page of my boys based on the sweet December sketch by Michelle:


My background was mostly hidden by the clusters with little bits peeking out, so that the images on the paper do not get covered up. This time, I've also kept my layering to a minimum so that more attention can be given to the details in the embellishments.

Some close-ups:


One of the pieces from Clip Frames which I altered using Blue Fern Studios' own embossing powder. Love it that other than the red, it has a gorgeous gold tint to it. Lots of stamping in the background too to bring out a botanical feel.


Some fussy cut flowers which I tucked behind my photo. It has Christmas bits in it with the holly, but who would have know how nicely it blends in here!


A Deja Vu Tweets chippie which I altered with gold ink and painted with Imagine Ink in Persimmon.

My second project and video tutorial is a Christmas mini album. When I first saw the Vintage Christmas papers, there were so many beautiful images I could cut out and use for an album so I knew I had to make one. As you all probably know by now, I'm not a Christmas project person with the exception of cards so this is really quite a first for me! Since the papers themselves are so gorgeous, I had to leave them as they are and build up smaller layers, so my tutorial focused more on playing with the chipboards. 


More close-ups:


I decided to add Liquid Pearls to my Gingerbread House after the video was made. 


Views of the inner pages:


And more close-ups:


And finally... here's the video. Have fun watching!


That's all I have for today. Happy crafting!

Jelissa

Thursday, October 15, 2015

Enjoying Outdoors with Maja Design


Hello Maja fans!

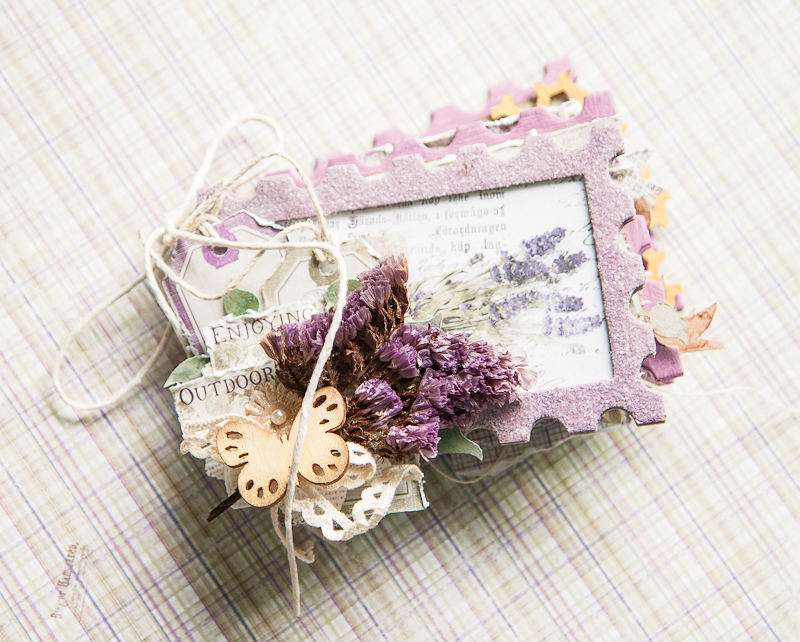
I'm on the blog today to share a mini album I've made from the brand new collection Enjoying Outdoors. I love the sweet combination of purples with browns and greens - and reminds me of the lavender fields we saw while on a road trip to the forests in Western Australia.


IMG_0258 
Here is the cover of my mini. I love the stalks of lavender in the die-cut sheet but lavenders don't grow well here, so I tied a small bunch of dried forget-me-nots (I keep lots of these whenever I receive a bouquet of flowers, which is not very often by the way!) with some lace. The die cut tags from the 6x6 paper stack are the perfect size for the mini too. 

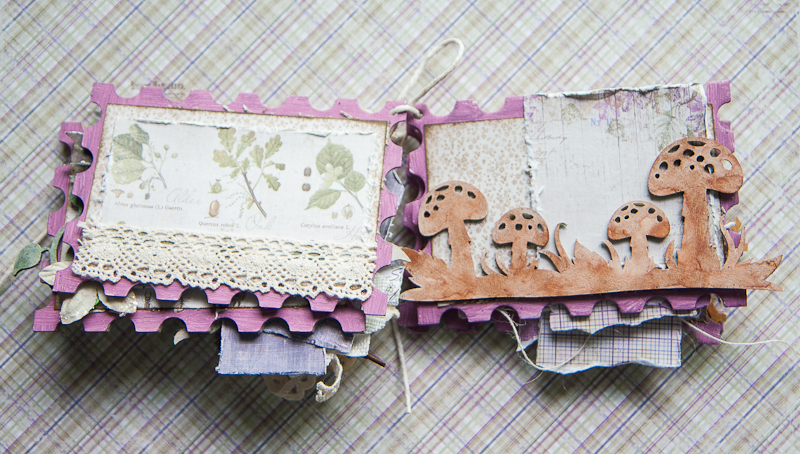
Here's a look at the inside pages:

IMG_0261

This is really a very small album - about 3" by 5" so I decided to keep things simple inside without excessive layers. Just lightly distressed edges on the papers and banners made from the info strip to give me plenty of space for photos and journaling.

IMG_0262 
A little more fun here with chipboard and lace. We always try to spot mushrooms on our walks in the park so I added those as a reminder of the little bits of nature we see when we're outdoors. Now if only there were truffles here.... 

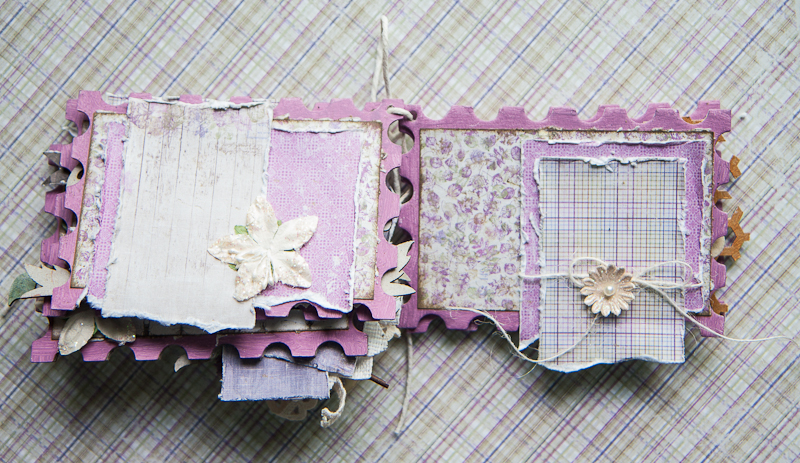
IMG_0264

In the end, I couldn't resist adding more layers and flowers.

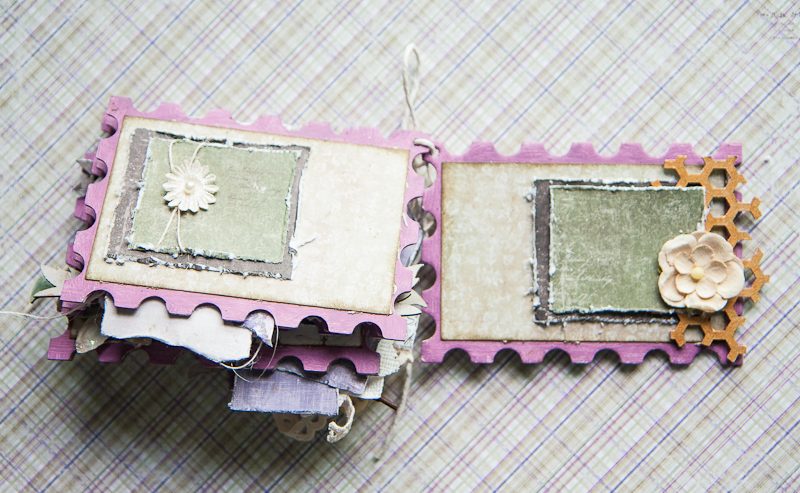
IMG_0265

And the last two pages of the album with simple photo mats and flat flowers so that the album doesn't end up too chunky.

That's all for the mini album and I hope to fill it up soon with pictures of our family out in the parks for our walks and the fun things that we see on the way!

love,
jelissa


Thursday, April 30, 2015

Baby's First Year Album with Maja Design and a Giveaway!

Hello friends!

By the time you're reading this, we would be up in the air on our way to Australia for a family holiday. I'm looking forward to a good time of rest and bonding with the kids, as well as catching up with family and friends there.

But first, a jumbo post for Maja Design today. I have a video tutorial to share with you, and it's a baby girl's first year album I made for our little girl who would be arriving in September. The Vintage Baby collection by Maja Design couldn't have come at a better time!

Here's the cover and some of the inside pages:


I made an accordion fold for the inside pages, with one side using lots of die cuts from the papers and the other with ample space for photos and journaling. The idea is to keep the whole album as simple as possible so that I have plenty of space for her photos and recording of her milestones.

And some of the details:


And here's the video tutorial:


And before I go, here's the other part of the jumbo post. I'm hosting the giveaway for April at Maja Design and this month's prize is the gorgeous Coffee in the Arbor collection!


To win this, simply carry out the following steps:

1) Become my blog follower
2) Subscribe to my Youtube channel
3) Follow the Maja Design blog
4) Share on your social media platform
5) Leave a comment here to say you have done so

That's it! I will pick a winner on 14th May when I return from my trip. And that's all I have for today. Thanks for dropping by!

love,


Monday, April 20, 2015

Sailing the Seas mini album with Off the Rails Scrapbooking

Good day friends!

Today I'm bringing you a short tutorial on a different way of putting your mini-album pages together. Unfortunately, this will also be my last post for OTRS as I prepare for my new baby's arrival, so I will be missing everyone!

Step 1

Here are my starting materials: a chipboard album base and my 6x6 paper pad. You can see that there is a ring and piece of twine for securing the album pages together and that is usually what most people would use. But my pages tend to be very dimensional so using these will make my album look overly chunky and stuffed. So I changed the way of securing these pages together so that the finished album look just nicely filled out.


Step 2
After trimming out the papers for each piece of chipboard, I trimmed out 3 more small pieces of patterned paper (0.75" x 1.5") and scored them at 0.25" and 0.5". The two ends of the fold goes under the patterned paper, with a nice margin of 0.25" in the centre for the desired thickness between each page.


This is what the spine should look like after assembling all the papers.


Step 3

I measured and trimmed out another sheet of pattered paper to glue over the spine. This does two things: (1) to reinforce the spine and (2) cover up the bare chipboard.


Step 4

Further reinforcement of the spine using fabric tape.


And this is the finished album with photos of the inside pages. 


And that is all I have for you today. 


love,


Saturday, January 10, 2015

Debut post for Wild Orchid Crafts

Hello lovely folks! How has your Saturday been?

Today I'm presenting my debut post for Wild Orchid Crafts and my project is a sweet shabby mini-tag album embellished with lots of WOC products.


I've used papers from the "Coffee in the Arbor" collection by Maja Design (6x6 paper pad) and trimmed them down to size. Also used are chipboards from Blue Fern Studios, which I absolutely love!


But you would agree with me that the most eye-catching part about the mini-album would be the gorgeous flowers from WOC. I have on my cover chrysanthemums, roses and sweet blossoms, all available from the WOC store.


The clock hands are from the small Roman clock chipboard, but the clock ring is actually a piece of metal embellishment from WOC, which I have altered.

Some inside pages:


My album ended up quite chunky because I just had to use these lovely 3D flowers on every page (well, almost every page).


Keeping the pages simple for photos and sentiments.


And here is my start-to-finish video tutorial:


List of supplies:

WOC products:

Mixed Size Open Roses MKX-599
Mixed Colour Sweetheart Blossom MKX-137
Mixed White Flowers & Rhinestone Embellishment Starter Pack MKX-323
Mixed Colour Chrysanthemums QVR-080
2-Toned Mixed Colour Wild Roses 30mm QVE-040
Mixed Clocks and Time Metal Embellishments GST-158
Vintage Cabochons Copenhagen MKX-195

Others:

Mediums: 13@rts, Luminarte Silks Glaze, Rangers, Lindy's Stamp Gang
Papers: Maja Design (Coffee in the Arbor collection)
Chipboard embellishments: Blue Fern Studios (Memory Frame Set, Roman clock set,
Chipboard tag album: Um Wow Studio
Trim, Twine: own stash

And here's a giveaway special! If you would like to own this mini tag album that I've created, just complete the following steps (international shipping included):

1) Subscribe to my blog and Youtube channel
2) Follow Wild Orchid Crafts on their blog and FB page 
3) Leave a comment below before 14 Jan 2015 (12 noon GMT+8) and I'll pick a winner on the 15th.
That's all I have for today. Have a crafty weekend!


 love,