Tuesday, February 23, 2016

Saying Goodbye

Hello friends,

how has everyone been? Today will be my last project for 13@rts after 2 wonderful terms with Aida and the best team in the world. It is after a lot of consideration that I have to say goodbye, as you all know we have a new addition to the family and it is getting more difficult to find time for myself and for creating. All the mothers out there will know - it is almost impossible to go to the toilet some times! Hopefully things will get easier as the kids grow up and I can start creating again.

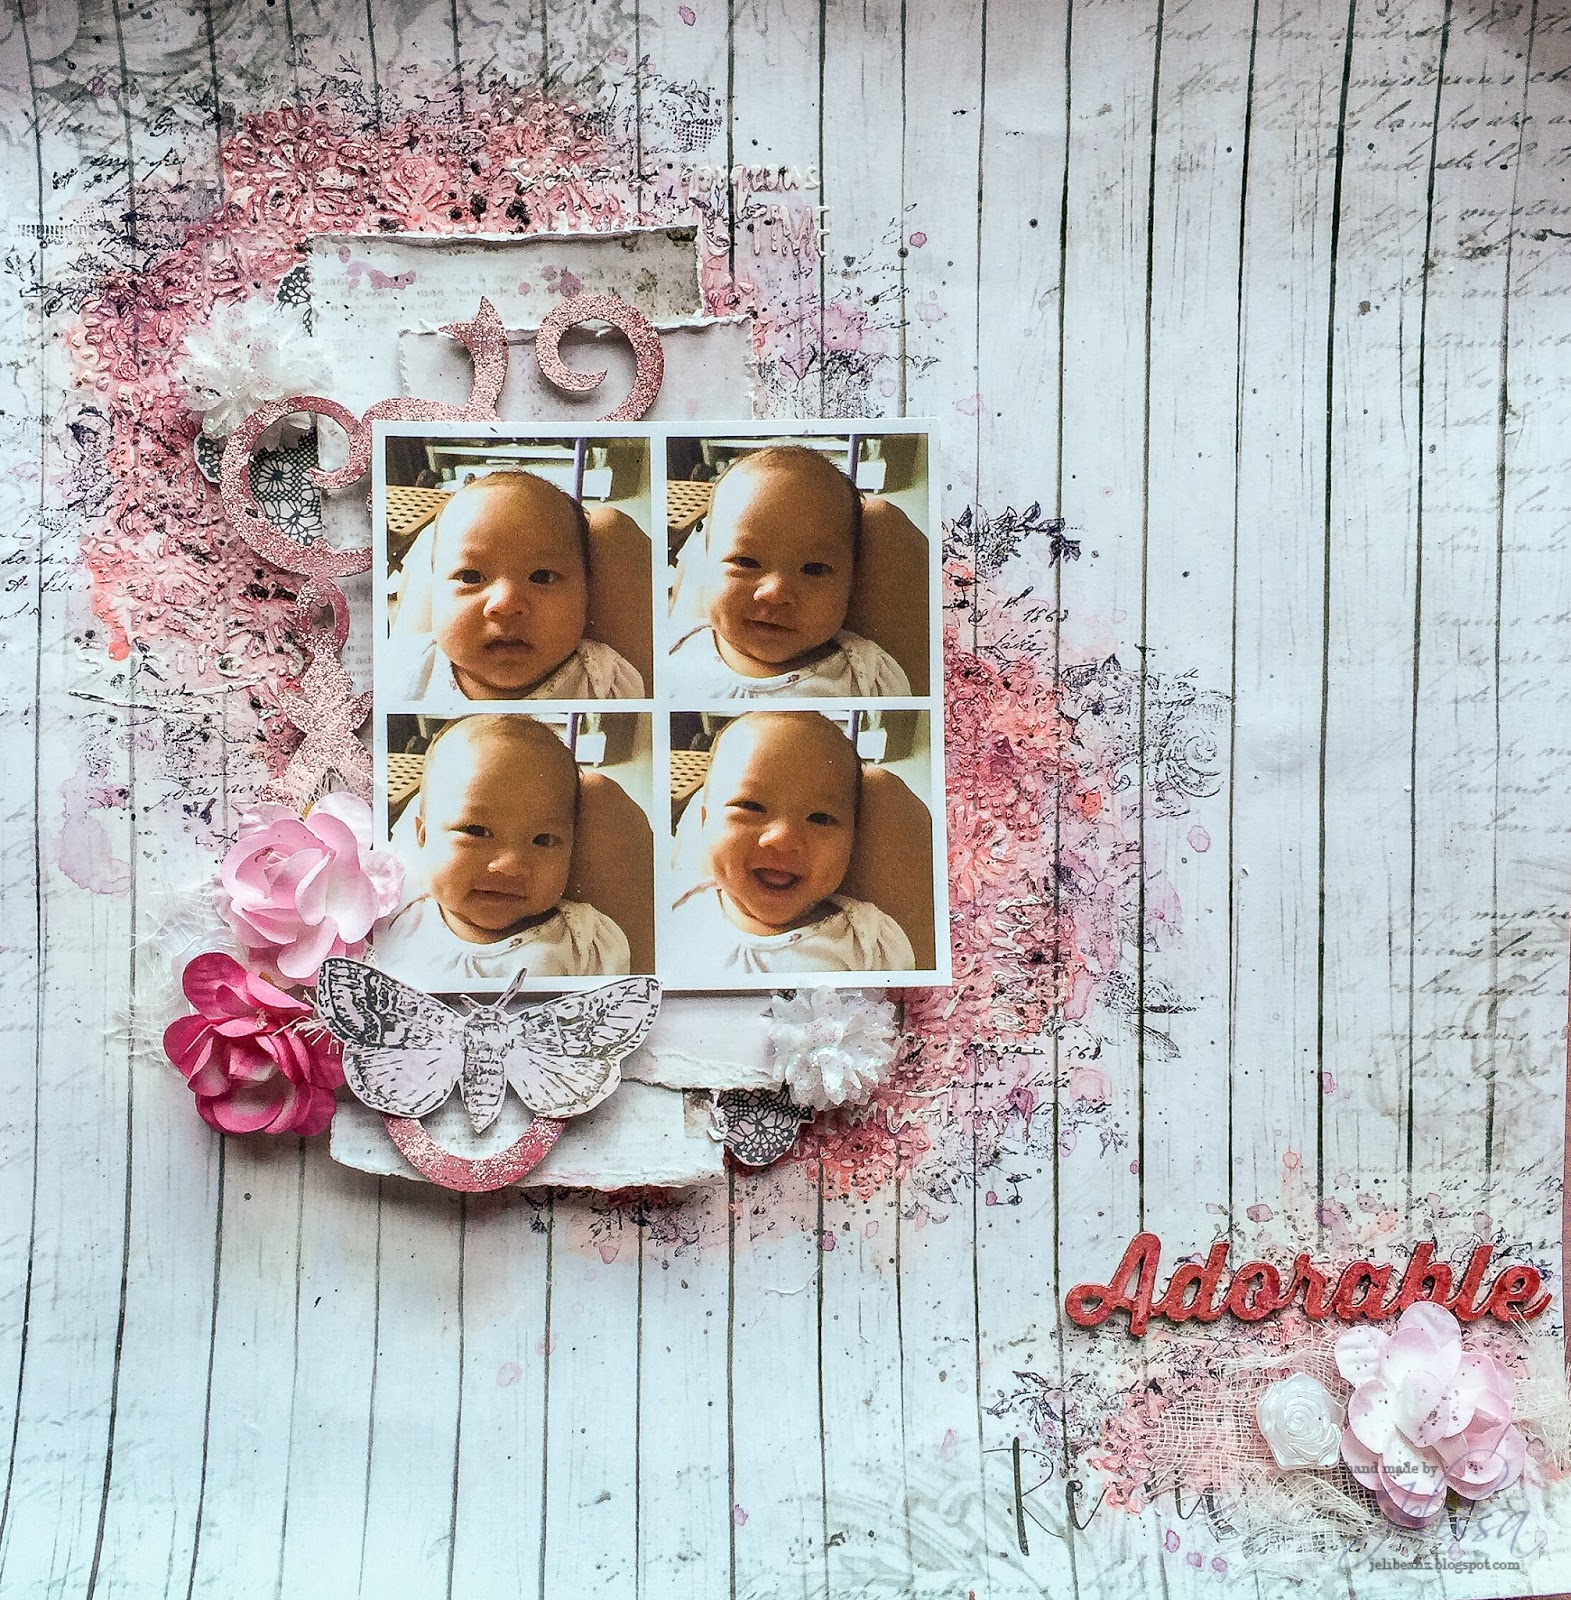
For my last post, I am sharing a project of my little girl. She has the sweetest smile that makes us unable to get angry with her when she is naughty. Yes, at 5 months old she is already up to a lot of mischief just like her two brothers.


I started with a white cardstock and primed it with 13@rts clear gesso before working on my background. Lots of layering of mediums - I first created an array of stenciled doily with a paste of Pink metallic paint and Magic powder. I then sprayed water generously to get the pink from the paste to bleed out. When this is dry, I painted on more colors with Pink pearl mist and Raspberry matt paint. After all the colors have dried, I stenciled more words with modeling paste and painted on a final layer with Chalk Dirty Pink. Lastly, this was finished with stamping to create motion on the page.

More details in the close-ups:


Straws that I made with Olga's Starlight collection papers. I brushed one end into gel medium and dipped it into gold stripes to create confetti. The Wheelies and Buttons chipboard was painted with Coral and Apricot matt paints. I had also sprinkled some gold microspheres here and there.


Left-over from one of the store's flower packs which I had torn off the centre for another project. This is perfect for staging my butterfly cut out from Secret Letters and I had painted lightly with Pearl Pink mist. I also built my paper layers from Starlight collection.


More background goodies here.


My balancing cluster create with some flowers and a cut-out butterfly from Secret Letters.


Chipboard title from 13@rts that I had left unaltered.


Hidden sentiments in the background.

That's all I have for today. I will miss all the wonderful people on the 13@rts team. Hope to see everyone again!
love,

Thursday, February 4, 2016

Adorable with 13@rts

Hello friends!

Hope the weather is turning warmer for all of you. It's raining today so it's lovely and cool now, and I'm really enjoying the light breeze. Today I'm on the blog to share a layout of my little girl with you using the Secret Letters collection.


I prepared my background with 13@rts clear gesso to leave the details on the paper visible, but I did dry brushed some gesso for a rugged look. I then used my favourite doily stencil from the collection and painted it over with Coral matte paint and Dirty Pink pastel mist - I'm so happy to be finally using so much pink! This was followed by stenciling on more word sentiments from "My Letters" mask.

Some close-ups:


A moth I fussy cut out and brushed on Clear Pearl mist for a beautiful shine.


My chipboard from Blue Fern Studios which I painted with Coral matt paint, and layered very thinly Pink Metallic Paint, followed by a layer of Clear Pearl mist before finishing off with some embossing powder.


Some other details here of the background and also another fussy-cut doily.


My title - painted with Pink Metallic paint. And I finished off the whole page with splatters of Berry pastel mist and Splash! acrylic ink.

That's all I have for today. Thanks for dropping by!


Wednesday, February 3, 2016

February Inspiration for Blue Fern Studios

Hello friends!

We've moved into the second month of 2016, and things are happening fast at home! For those in the northern hemisphere, I hope your days are getting warmer too. And those down under, keep chilling!

I'm up on the blog today to share two creations using the amazing Blush collection. I love this line of papers because of the sweet colors and it's also just perfect for scrapping photos of any kind, not only for Valentine's Day. 

First to show you is this layout of my husband and me. I hardly ever scrap our photos because I'm camera shy and the husband is a selfie addict with our kids. But this photo is just perfect for the papers so I couldn't resist. 


My background paper is "Enamored" - and it truly fits the name! Love the B side so much that I've designed a  workshop just around it. The details and subtle masking makes it perfect for mixed media projects that carry a light touch, which is exactly what I have done here.

Some close-ups:


I used the stamps from Romantic Accents set together with Icicle embossing powder (these two are a perfect match) and created a detail resist over which I painted. You can see that I've used translucent water colors to preserve as much of the background paper as I can.


A lot of fussy cut details under my Flutter Medley chipboard - which I had embossed using Icicle EP and Textured Circle stamp.


Layering the different scraps of papers and journaling cards behind the sweet little girl I've cut out.


The other end of the Flutter Medley chipboard.


My title piece from Clip Frames which I first embossed all over with Oatmeal EP, then using the same stamp, added on another layer of Cerulean EP.


My second share is one of my little girl and her dad. I've gone for a brighter look because these two were having such a delightful time together playing.


Some close-ups:


My title - Daddy's Little Girl. This is quite a big piece and so I didn't follow conventional ways of placing titles (ie. under or next to photo) but choose to give it its own space above the photo.


Some background detail created with the Key to My Heart stamp and embossing powder.


Rose Medley chipboard altered with water colors, mist and embossing powder.


Layering behind the chipboard.


My must-have floral cluster.

And below is how I put this layout together. Sit back and enjoy the video tutorial!


If you don't already remember, a new month means a new sketch! This is a lovely one by Michelle and I absolutely love it!


So do find the time to join in the challenge to win yourself some prizes!

And last but not least, presenting our new paper collection!


The details on this collection is amazing, and a definite must-have! Check out our blog for more images from the papers.


That's all for today, thanks for dropping by!